What is Stocking Stitch in Knitting?
Welcome to the world of knitting! If you’re wondering about stocking stitch, you’re in the right spot. It’s a basic technique every knitter should know. It makes a smooth fabric with a V-shape on the right side and a bumpy look on the wrong side.
This stitch is great for making everything from warm sweaters to fancy accessories. The definition of stockinette stitch is simple. It’s made by alternating knit and purl stitches when working flat. Or, you can knit every stitch when working in the round.
Beginners find this stitch both fun and easy. It’s a great way to start your knitting journey. Whether you want to make your first scarf or something more complex, knowing stocking stitch is key to success!
Ready to learn about this classic technique? I’ll show you everything you need to know about stocking stitch. It will make your knitting journey both enjoyable and rewarding.
Understanding Stocking Stitch: The Foundation of Knitting
Stocking stitch is a basic knitting skill that’s key to many projects. It’s a fundamental part of knitting, making a smooth fabric loved by all. It’s perfect for beginners and experts alike.
Basic Elements of Stocking Stitch Pattern
The stocking stitch pattern is simple yet beautiful. It has just two rows:
- Knit stitch on the right side of the work
- Purl stitch on the wrong side of the work
When knitting in the round, you just keep knitting each row. This creates a fabric that looks smooth and seamless.
Why Stocking Stitch is Essential for Knitters
Learning this technique is very important for several reasons:
- It makes a fabric that’s smooth and even
- It’s a base skill for more complex patterns
- It works well with almost all yarns
- It makes it easy to change colors and designs
Common Uses in Knitting Projects
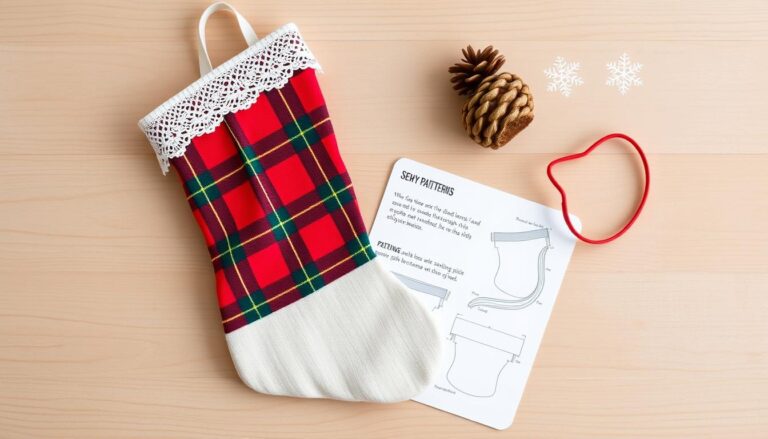
Stocking stitch is great for many projects. Sweaters, scarves, baby blankets, and light garments often use it. It’s perfect for beginners and experts who want a classic look.
What is Stocking Stitch in Knitting: A Complete Guide

Stocking stitch is a basic knitting technique for beginners. It makes a smooth, elegant fabric with a unique look. This stitch is key for many knitting projects, making it vital for beginners to learn.
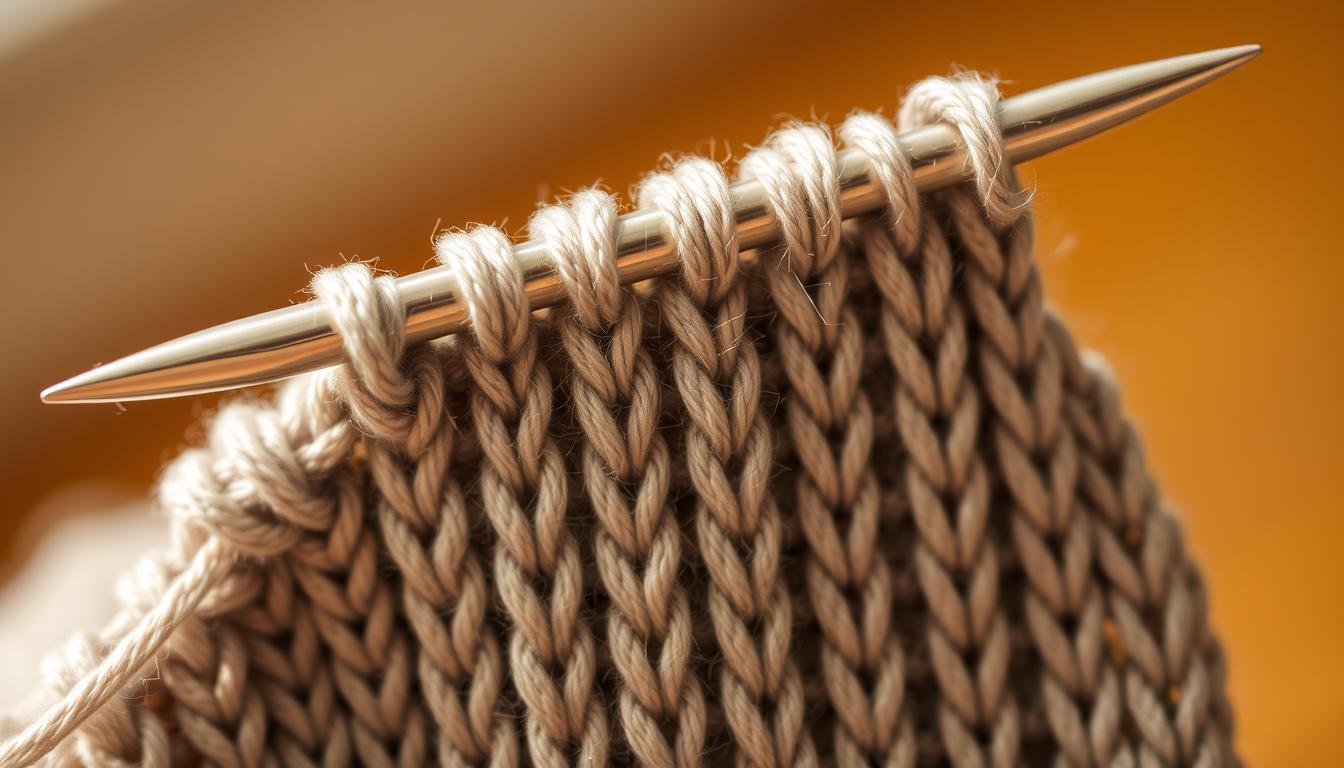
The beauty of stocking stitch comes from its simple yet powerful design. In round knitting, it’s made by knitting every row. For flat knitting, it alternates between two rows:
- Knit rows (right side of the fabric)
- Purl rows (wrong side of the fabric)
Beginners often start by learning these two stitches. The outcome is a fabric with a smooth surface and clear features:
| Side | Appearance | Texture |
|---|---|---|
| Right Side | Smooth, V-shaped stitches | Flat and uniform |
| Wrong Side | Horizontal bump lines | Slightly textured |
Stocking stitch also has a unique edge curl. This happens because of the tension from alternating knit and purl rows. Skilled knitters use this to their advantage in many designs.
Learning stocking stitch opens up many knitting options. It’s essential for making sweaters, scarves, and more. This technique will be a valuable tool in your knitting journey.
Tools and Materials Needed for Stocking Stitch
Starting your knitting journey needs the right tools and materials. Choosing the perfect equipment makes your experience smooth and fun. Let’s look at the essential supplies for beautiful stocking stitch projects.

Having the right materials is key for any knitting project. Your toolkit doesn’t have to be complicated. It should have some important items for a comfortable and enjoyable beginner knitting experience.
Choosing the Right Needles
Needle selection is a critical first step in your knitting tutorial. For stocking stitch, consider these options:
- Straight needles: Perfect for beginners and flat knitting
- Circular needles: Versatile for both flat and round knitting
- Sizes ranging from US 7-9 (4.5-5.5mm) work best for most starter projects
Selecting Appropriate Yarn Types
Yarn is important for your knitting experience. For beginners, I recommend:
- Medium-weight wool or wool-blend yarns
- Light colors to easily see your stitches
- Smooth textures that glide easily on needles
Additional Supplies for Success
A few extra tools can make your knitting better:
- Stitch markers
- Tape measure
- Scissors
- Darning needle for weaving in ends
Remember, the best tools are the ones that feel comfortable to you. Don’t be afraid to try different things and find what works best for you!
Step-by-Step Guide to Creating Stocking Stitch
Learning to knit the stocking stitch is key for all knitters. It makes a smooth, elegant fabric great for many projects. Here’s how to knit stockinette stitch step by step.

To start, you need to know the knit and purl stitches. These are the basics for a beautiful stockinette fabric.
- Start with clean, even tension in your yarn
- Choose medium-weight yarn for beginners
- Use straight or circular needles
The basic technique for how to knit stockinette stitch involves alternating rows:
- Right side (knit) row: Knit every stitch across the row
- Wrong side (purl) row: Purl every stitch across the row
When working flat, alternate knit and purl stitches for a smooth surface. For round projects, knit every row for the same look.
Pro tip: Keep your tension consistent. Uneven stitches can make your fabric look messy. Practice makes perfect! Don’t get discouraged if your first attempts aren’t flawless.
Remember, the beauty of the stocking stitch lies in its simplicity. With practice, you’ll create smooth, professional-looking fabric. It’s perfect for sweaters, scarves, and many other knitting projects.
Common Mistakes and Troubleshooting Tips

Every beginner knitting journey comes with its share of challenges. Knowing common mistakes can help you improve your stocking stitch. It also builds confidence in your crafting skills.
Preventing Edge Curling
Edge curling is a common issue for new knitters. It happens because stocking stitch naturally curls inward. To prevent this:
- Use a slightly larger needle size
- Add a border of garter stitch around your project
- Block your finished piece to flatten edges
Fixing Dropped Stitches
Dropped stitches can seem scary, but they’re easily fixable. Here’s a quick method:
- Identify the dropped stitch
- Use a crochet hook to pick up the ladder
- Pull the dropped stitch back through each rung
- Return the stitch to your knitting needle
Maintaining Even Tension
Consistent tension is key for beginner knitting. Practice these tips to improve:
- Hold yarn consistently in your dominant hand
- Practice maintaining steady grip
- Check your work frequently
- Use stitch markers to track progress
Remember, every knitter started exactly where you are now. Mistakes are part of learning, and each one makes you a better crafter!
Advanced Techniques and Variations
Exploring advanced knitting techniques can make your stocking stitch amazing. As you get better at this basic stitch, you’ll find new ways to make it stand out.
Let’s look at some creative ways to add depth and texture to your projects:
- Textured Stocking Stitch: Try different yarn weights and needle sizes for unique patterns
- Incorporate slip stitches for fancy effects
- Blend multiple colors in your stocking stitch
Learning advanced knitting terms helps when you play with stitches. Try these cool techniques:
- Twisted Stocking Stitch: Knit through the back loop for a tighter, more defined look
- Slipped Stitch Edge: Get cleaner, more professional-looking edges
- Alternating Yarn Weights: Mix different yarn textures in one project
For those ready for a challenge, these variations offer endless creative possibilities. Don’t hesitate to try new things and make your stocking stitch truly unique!
Projects Perfect for Practicing Stocking Stitch
Learning to knit stocking stitch opens up a world of creative possibilities. It’s great for beginners or those looking to improve their skills. These projects will help you grow more confident and skilled.
I’ve picked projects that let you practice stocking stitch while making something beautiful and useful. Start simple and then try more challenging projects.
Beginner-Friendly Projects
These starter projects are perfect for beginners. They help you learn the basics:
- Cozy Washcloths: Great for practicing tension and keeping stitches even
- Simple Scarves: A classic choice to master stocking stitch basics
- Baby Blankets: Larger projects for more practice
Intermediate Level Challenges
When you get better at stocking stitch, try these more advanced projects:
| Project | Difficulty Level | Skills Practiced |
|---|---|---|
| Knitted Beanie | Intermediate | Circular knitting, decreasing |
| Simple Sweater | Advanced Beginner | Shaping, seaming |
| Throw Pillow Cover | Intermediate | Consistent tension, finishing |
Each project is a chance to get better at stocking stitch. Remember, the more you practice, the better you’ll get!
Tips for Achieving Professional-Looking Results
Mastering stockinette stitch in knitting takes focus and practice. I’ll share some tips to make your stocking stitch look amazing.
Getting the right tension is key to professional-looking knitting. When you learn stockinette stitch, keeping your tension even is important. Here are my top tips:
- Use stitch markers to track your progress and maintain even rows
- Practice maintaining consistent yarn tension
- Block your finished piece to smooth out minor imperfections
- Choose high-quality yarns for a more polished appearance
Now, let’s look at some techniques to improve your knitting:
| Technique | Professional Impact |
|---|---|
| Even Tension Control | Prevents uneven fabric texture |
| Proper Needle Selection | Ensures smooth stitch formation |
| Regular Practice | Develops muscle memory |
Pro tip: Always swatch before starting a larger project. This simple step helps you understand your personal knitting rhythm and adjust your technique.
Remember, getting professional-looking stockinette stitch takes patience and practice. Don’t get discouraged if your first attempts aren’t perfect – every stitch is a learning opportunity!
Measuring and Blocking Your Stocking Stitch Work
Finishing your knitting project is key. It turns your raw work into something polished and professional. Measuring and blocking are essential steps to get your project just right.
First, make sure your project is the right size. Before you block, measure your work carefully.
Precise Measuring Techniques
- Use a flat, hard surface for measuring
- Employ a professional measuring tape
- Lay your knitted piece flat without stretching
- Measure both length and width carefully
- Record measurements before blocking
Blocking Methods for Different Fibers
Blocking methods change based on your yarn. Each type needs a special way to get the best results.
- Wool: Steam blocking works best
- Cotton: Wet blocking recommended
- Synthetic fibers: Gentle spray blocking
Learning these steps will make your stockinette stitch look amazing. It will go from simple to professional.
Conclusion
Learning about stocking stitch in knitting opens a world of creativity for beginners. This basic technique is your entry into the vast world of textile crafting. With practice, you’ll see how stocking stitch turns simple yarn and needles into stunning projects.
As you keep learning to knit, remember that mastering stocking stitch takes time and effort. Every row you knit helps build your skills and confidence. The fabric you create can be used to make sweaters, scarves, blankets, and more, showing off your growing abilities.
Your journey in knitting is special and personal. Enjoy the learning process, try different yarns and needles, and don’t worry about mistakes. Every experienced knitter began where you are now, eager to create something beautiful with their hands.
The stocking stitch technique is more than a pattern; it’s a way to express yourself and be creative. Keep practicing, stay curious, and watch your skills grow into amazing handcrafted pieces that tell your story, one stitch at a time.