Quick Weave Hairstyle Safe Removal With Stocking Cap
Removing a quick weave can be tricky, but with the right techniques, you can protect your natural hair. This makes the process smooth and damage-free. Learning how to remove a quick weave with a stocking cap is key for anyone who loves trying new hairstyles.
Removing a quick weave needs patience and careful attention. The stocking cap method is gentle, which helps protect your natural hair. Whether you’re new to weaves or experienced, these tips will help you remove your weave confidently.
Protecting your hair is very important when removing a weave. The stocking cap acts as a barrier between your hair and the adhesive. This makes the process safer and more controlled. I’ll share my experience to help you remove your quick weave like a pro.
Knowing the right method is key. The wrong way can cause hair breakage, scalp irritation, and stress. My aim is to give you the knowledge to make the process easy, safe, and stress-free.
Get ready to learn the best and gentle way to remove your quick weave. This will keep your natural hair healthy and beautiful. With these expert techniques, you’ll be confident in removing your hair from start to finish.
Understanding Quick Weave and Stocking Cap Method
A quick weave with a stocking cap is a popular hair styling technique. It offers versatility and protection for your natural hair. This method makes it easy to remove a quick weave without damaging your hair.
The stocking cap acts as a protective barrier between your natural hair and the weave extensions. It creates a smooth foundation. This helps prevent direct contact with adhesives and makes removing a quick weave easier.
Benefits of Using Stocking Cap Method
- Provides a protective layer for natural hair
- Reduces direct contact with bonding glue
- Creates a smooth base for weave installation
- Simplifies the removal process
- Minimizes hair breakage
Common Materials Used in Quick Weaves
| Material | Purpose | Recommended Quality |
|---|---|---|
| Stocking Cap | Hair Protection | Soft, Stretchy Nylon |
| Hair Extensions | Styling Coverage | Human or High-Quality Synthetic |
| Bonding Glue | Attachment Method | Skin-Safe Adhesive |
Why Proper Removal Matters
Proper quick weave removal is key to keeping your natural hair healthy. Rushing or using aggressive techniques can lead to unnecessary breakage and scalp damage. Learning the right method helps protect your hair’s integrity and ensures a smooth, damage-free removal process.
Spending time to learn the correct removal technique can save you from hair disasters. It keeps your natural hair looking beautiful between styling sessions.
Essential Tools and Products for Safe Quick Weave Removal
Removing a quick weave needs the right tools and products for safety and no damage. Start by getting the best supplies to protect your natural hair. This makes the removal process smooth and easy.

- Adhesive Remover: A special product to safely break down hair glue
- Wide-toothed comb for gentle detangling
- Soft microfiber towels
- Conditioning spray
- Protective gloves
When choosing how to remove a quick weave, consider these key products. They make the process easier and protect your natural hair:
| Product | Purpose | Recommended Use |
|---|---|---|
| Oil-Based Remover | Dissolve hair glue | Apply sparingly, work gently |
| Leave-In Conditioner | Protect hair during removal | Use before and after removal |
| Rubbing Alcohol | Remove stubborn adhesive | Use as a last resort, sparingly |
Pro tip: Choose quality removal products to protect your natural hair. While cheaper options might work, professional-grade products usually give the best results for safe and effective quick weave removal.
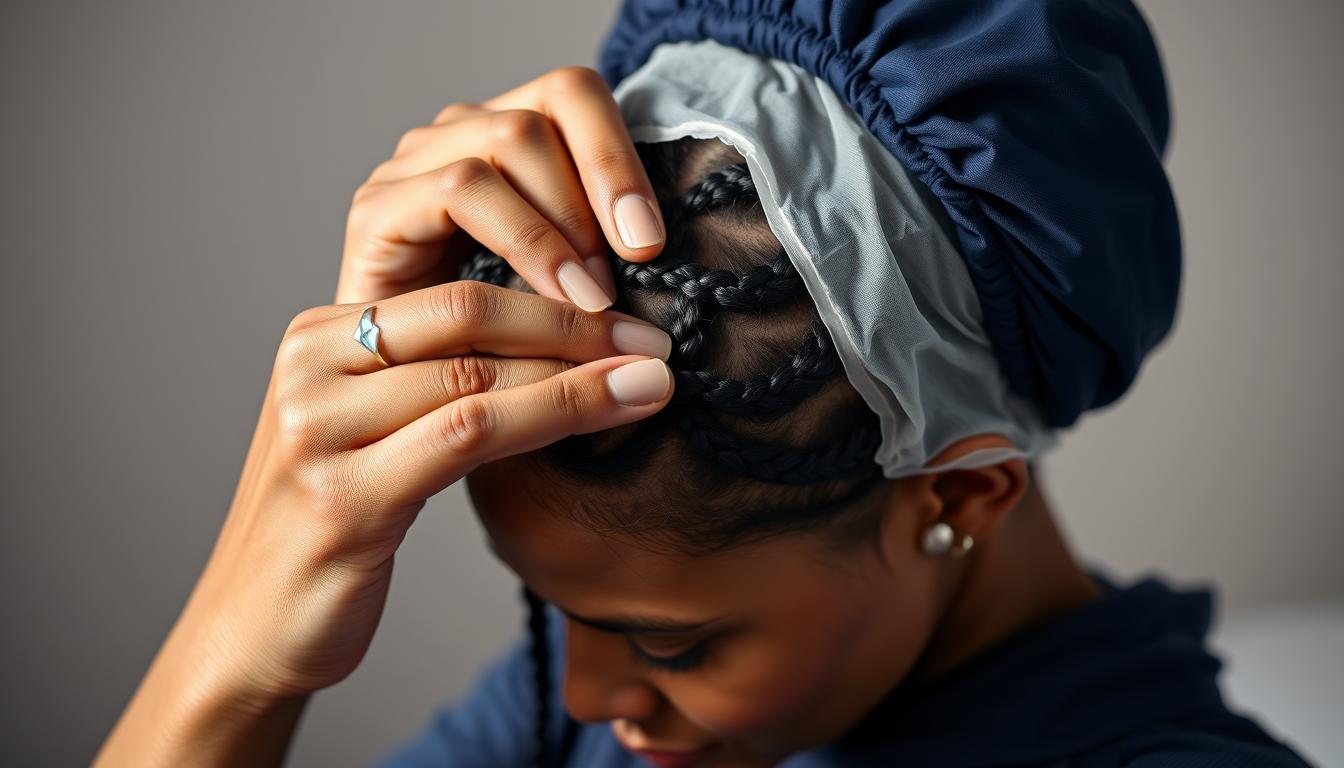
How to Remove a Quick Weave with Stocking Cap
Removing a quick weave needs patience and the right method. I’ll show you a step-by-step guide. It protects your natural hair and makes the process smooth.

First, get all the tools you need. The right tools and approach are key for a successful removal.
Preparing Your Hair for Removal
Make a comfy workspace with good light. You’ll need:
- Wide-tooth comb
- Hair conditioner
- Removal solution
- Soft towels
- Patience and gentle hands
Loosening the Adhesive Bond
To remove it gently, break down the adhesive. Use a hair removal solution or a mix of conditioner and oil to dissolve the glue.
| Removal Method | Time Required | Difficulty Level |
|---|---|---|
| Conditioner Soak | 15-20 minutes | Easy |
| Removal Solution | 10-15 minutes | Moderate |
Gentle Separation Techniques
Separate the weave from your hair slowly and carefully. Never pull or tug – it can damage your hair and scalp.
- Start at the edges of the weave
- Use your fingers to gently separate tracks
- Apply more solution if needed
- Work in small sections
- Be extra careful near your scalp
A step-by-step quick weave removal guide needs careful attention and a gentle touch. Take your time, and your natural hair will thank you!
Best Practices for Protecting Natural Hair During Removal

When you remove a quick weave at home, protecting your natural hair is key. It’s a delicate process, but with the right steps, you can keep your hair healthy.
Here are some important tips to protect your hair:
- Use a moisturizing leave-in conditioner before starting removal
- Work in small, manageable sections to reduce stress on hair
- Apply a gentle detangling solution to loosen adhesive bonds
- Use a wide-tooth comb to prevent unnecessary breakage
Here are some essential products for quick weave removal at home:
| Product Type | Purpose | Recommended Usage |
|---|---|---|
| Coconut Oil | Soften Adhesive | Apply before removal |
| Protein-Based Conditioner | Strengthen Hair | Use post-removal |
| Silk Scarf/Bonnet | Protect Hair Strands | Wear during recovery |
Patience is key when removing a quick weave at home. Don’t rush it, or you might damage your hair. Take your time, be gentle, and focus on keeping your hair healthy.
Common Mistakes to Avoid When Removing Quick Weaves
Removing a quick weave can be tricky. The wrong move could damage your beautiful hair. It’s important to know the safest way to remove a quick weave to protect your natural locks.

Harmful Removal Methods to Steer Clear Of
Some removal techniques can harm your hair. Here are the most dangerous methods:
- Pulling or ripping out the weave forcefully
- Using sharp tools near your scalp
- Applying excessive heat without proper protection
- Skipping the softening process for adhesive
Warning Signs of Hair Damage
Knowing the signs of hair damage is key when removing a quick weave. Watch out for these red flags:
| Damage Indicator | Potential Consequence |
|---|---|
| Excessive shedding | Potential scalp irritation |
| Visible breakage | Weakened hair structure |
| Scalp sensitivity | Potential infection risk |
When to Seek Professional Help
Sometimes, the safest way to remove a quick weave is to see a professional. Consider booking a salon appointment if you experience:
- Persistent adhesive residue
- Significant hair tangling
- Scalp irritation or pain
- Uncertainty about removal process
Remember, your hair’s health is always more important than a DIY attempt gone wrong!
Post-Removal Hair Care and Treatment
After taking out a quick weave with a stocking cap, your hair needs extra care. The removal can stress your hair, so a special care routine is key to keep it healthy.
Your hair care plan should cover three main points:
- Hydration and moisture restoration
- Protein treatment and strengthening
- Scalp and hair follicle care
Deep conditioning is vital after removing a quick weave. Use masks rich in protein to fix any damage from the removal. Choose products with keratin, biotin, and natural oils.
Here are some top hair care products for after removal:
| Product Type | Key Benefits | Recommended Frequency |
|---|---|---|
| Deep Conditioner | Restores moisture | Weekly |
| Protein Treatment | Strengthens hair strands | Every 4-6 weeks |
| Scalp Serum | Promotes healthy growth | Bi-weekly |
Let your hair rest between quick weave installations. This break lets your hair breathe, heal, and get stronger. Waiting 4-6 weeks between styles is best for your hair’s health.
Tips for Maintaining Healthy Hair Between Quick Weave Installations
It’s important to take care of your natural hair between quick weave styles. The right care can prevent damage and keep your hair strong and vibrant. I’ll share some key tips to help keep your hair healthy and ready for future styles.
Keeping your hair strong needs a smart plan. I’ve found some great ways to keep your natural hair in great shape between styles.
Nourishing Hair Care Products
Choosing the right products is key for your hair’s health. Here are my top picks:
- Protein-rich deep conditioning treatments
- Lightweight moisturizing serums
- Scalp-nourishing oils
Natural Hair Strengthening Techniques
Natural methods can also boost your hair’s health. Here are some tips for strengthening your hair:
- Weekly scalp massage to stimulate blood circulation
- DIY hair masks with natural ingredients
- Gentle detangling techniques
| Hair Care Focus | Recommended Actions | Frequency |
|---|---|---|
| Moisture Retention | Deep conditioning | Weekly |
| Scalp Health | Gentle massage | 2-3 times weekly |
| Protein Treatment | Strengthening mask | Monthly |
Pro tip: Listen to your hair’s needs and adjust your care routine as needed. Every head of hair is different!
Professional vs DIY Quick Weave Removal: Making the Right Choice
Choosing between a professional or DIY quick weave removal can be hard. It depends on your hair’s health and the removal experience you want.
Think about your skills and hair condition when deciding. Some jobs need a pro, while others can be done at home with the right steps.
Comparing Removal Options
| DIY Removal | Professional Removal |
|---|---|
| Cost-effective | Expert precision |
| Flexible timing | Minimal hair damage risk |
| Personal control | Professional products |
Consider these important points:
- Hair texture complexity
- Adhesive type used
- Personal comfort level
- Budget constraints
Pro tip: If unsure about safe removal, a professional stylist can help avoid hair damage.
For those confident, removing a quick weave safely involves gentle products and patience. Experts suggest using special removal solutions and avoiding harsh pulling.
Protecting your natural hair is key. Whether DIY or professional, understanding the removal process is essential.
Conclusion
Removing your quick weave doesn’t have to be scary. Learning the right ways to take it off without harming your hair is key. It takes patience, care, and a focus on keeping your hair healthy.
We’ve covered all you need to know to remove your quick weave safely. From choosing the right tools to using gentle methods, you’re ready. Remember, the more you practice, the more confident you’ll become.
Hair care is a journey of self-discovery and empowerment. Learning to remove quick weaves without damage is an investment in your hair’s health. Trust yourself, be patient, and always choose gentle methods that care for your hair.
As you try out new hairstyles, remember these removal tips. Your dedication to learning hair care will help you keep your hair looking great. Your hair will show off your unique style and personality.