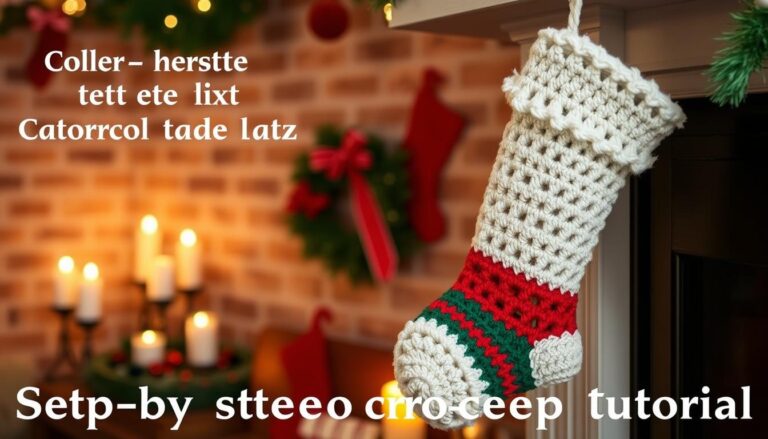
Knit a Stocking: Cozy DIY Project for Beginners
Want to make a special holiday gift? Learning to knit a stocking is a great way to add a personal touch. This pattern will help you go from beginner to pro in no time.
Knitting a stocking is more than a craft. It’s a way to start a family tradition. You can make a gift for someone special or decorate your home with your own handmade stocking.
I’ll guide you through each step of making a beautiful stocking. We’ll break down hard parts into simple steps. You’ll learn how to pick the right yarn and add special touches.
Our guide will turn a ball of yarn into a beautiful holiday gift. Don’t worry if you’re new to knitting. I’ll teach you everything you need to know to make a stocking that looks amazing.
Essential Materials and Tools for Knitting Your First Stocking
Starting to knit a stocking needs the right stuff. I’ll show you how to pick the best materials for a cozy, handmade stocking.
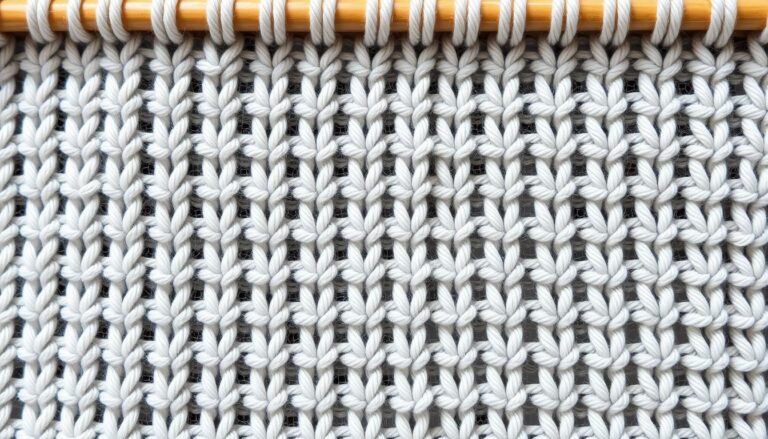
Choosing the Right Yarn Weight and Fiber
When picking yarn for stockings, think about warmth and durability. Wool is great for keeping things cozy and has a classic holiday vibe. Go for a medium-weight wool yarn for a sturdy and comfy stocking.
- Merino wool: Soft and lightweight
- Worsted weight wool: Ideal for traditional stockings
- Superwash wool: Easy to clean and maintain
Required Knitting Needles and Notions
Circular needles are a must for beginners. They make it easier to keep your stocking even and balanced.
| Needle Type | Recommended Size | Best For |
|---|---|---|
| Circular Needles | US Size 7-9 | Consistent stocking shape |
| Double-Pointed Needles | US Size 7-9 | Toe and heel sections |
Optional Tools for Better Results
Some extra tools can make your knitting better and your stocking look pro.
- Stitch markers
- Row counter
- Tapestry needle for weaving ends
- Measuring tape
With these tools and materials, you’re set to start knitting your stocking. Remember, quality materials make a big difference in your holiday stocking.
How to Knit a Stocking: Step-by-Step Guide
Starting your first holiday stocking DIY project can be thrilling and a bit scary. Knitting stockings for beginners is easier than you think. I’ll guide you through the key steps to make a lovely, handmade stocking. It will become a special holiday tradition for you.

- Cast On Stitches: First, pick your favorite method. Beginners often prefer the long-tail cast-on. It gives a neat, stretchy edge that’s great for holiday stockings DIY.
- Knit the Cuff: Start with ribbing for a stretchy, decorative top. A 2×2 rib pattern is best for beginners.
- Shape the Leg: Then, switch to stockinette stitch. Knit in the round to get a smooth fabric.
Pro tip for beginners: Use stitch markers to keep track and maintain even tension. This helps avoid mistakes and keeps your project looking great.
Remember, practice makes perfect. Don’t worry if your first try isn’t perfect. Knitting gets better with time and effort.
- Keep your stitches even
- Count your stitches regularly
- Take breaks to avoid hand fatigue
The secret to great holiday stockings DIY is to keep a steady pace and enjoy the process. Every stitch brings you closer to a unique, handmade treasure. It will warm hearts during the festive season.
Understanding Basic Stocking Construction and Design
Knitting traditional knit stockings needs a good grasp of their special build. Each stocking is a piece of textile art with parts that come together. They make a holiday accessory that’s both useful and lovely.

Looking into traditional knit stockings, you’ll find key parts that make up their classic look:
- Cuff: The top part that adds style and shape
- Leg: The main vertical part of the stocking
- Heel: A key part that lets the stocking fit the foot
- Foot: The bottom part for the foot
- Toe: The rounded or pointed end of the stocking
Common Stocking Shapes and Sizes
Traditional knit stockings vary in size to fit different tastes. They usually range from:
- Small (Child Size): 12-15 inches long
- Medium (Adult Size): 16-20 inches long
- Large (Oversized Decorative): 22-24 inches long
Design Elements to Consider
When making your stocking, think about these design points. They can turn a simple knitted item into a treasured holiday gift:
- Yarn texture and weight
- Color scheme and pattern
- Decorative elements like cables or colorwork
- Functional features such as hanging loops
Knowing these basic building blocks will help you make traditional knit stockings. They’ll be both stunning and full of meaning.
Mastering the Cuff and Leg Portion
Starting your ribbed stocking pattern begins with creating a sturdy and flexible cuff. The cuff is key for keeping the stocking’s shape and ensuring a comfortable fit. I’ll guide you through the essential techniques to make a professional-looking ribbed section. This will make your handmade stocking stand out.
When working on the ribbed stocking pattern, focus on two key elements:
- Consistent stitch tension
- Proper circular knitting technique
For the best ribbed stocking pattern, use 2×2 ribbing. This means alternating two knit stitches with two purl stitches. It creates a stretchy, textured edge that looks professional and helps the stocking keep its shape. The ribbing usually goes about 2-3 inches from the top of the stocking.
Knitting in the round is key for a seamless ribbed section. Use double-pointed needles or a circular needle for smooth, even stitches. Take your time and keep an even tension. This makes all the difference in creating a polished ribbed stocking pattern.
- Choose soft, elastic yarn
- Use smaller needles for tighter ribbing
- Practice maintaining consistent tension
Pro tip: Count your stitches often to keep the correct ribbed pattern. A few misplaced stitches can mess up the whole look of your stocking.
Creating the Perfect Heel Turn and Gusset
Knitting a stocking heel is a key part of your project. It turns a simple tube into a wearable garment. The heel construction needs precision and patience, but with the right techniques, you’ll master it quickly.

Understanding the heel turn is like solving a small knitting puzzle. Each step builds upon the last, making a seamless and comfortable heel that fits perfectly.
Heel Flap Techniques
The heel flap gives your knit stocking heel strength and durability. Here are key techniques for a robust foundation:
- Choose a slip stitch pattern for extra cushioning
- Maintain consistent tension throughout the flap
- Work with reinforced heel yarn for longer wear
Turning the Heel Successfully
Turning the heel might seem daunting, but it’s straightforward when broken down. The goal is to create a cup-like shape that hugs the heel.
- Count stitches carefully
- Use short rows to shape the heel
- Decrease stitches symmetrically
Picking Up Gusset Stitches
Gusset stitches connect the heel to the leg of the stocking. Here’s a quick reference for smooth gusset pickup:
| Step | Technique | Tip |
|---|---|---|
| 1 | Pick up along heel flap edge | Use consistent spacing |
| 2 | Maintain even stitch count | Count carefully |
| 3 | Decrease gusset stitches | Return to original stitch count |
With practice, your knit stocking heel will become a smooth, professional-looking element of your handmade creation.
Shaping the Foot and Toe Section

Knitting stockings in the round needs careful attention when shaping the foot. After the heel, you move to the foot’s smooth shape. This turns your flat knitting into a three-dimensional sock.
To shape the foot well, follow these steps:
- Measure your foot or the person’s foot you’re making it for
- Keep knitting in the round with the same tension
- Keep the stitch count even in the foot section
The foot section needs precision. Decreases will help create a snug, comfortable fit. Use gentle decrease techniques to keep the stocking’s elegant shape. Decrease stitches slowly to avoid sudden shape changes.
When knitting stockings in the round, focus on the toe area. The toe needs careful decreases for a rounded, comfy finish. Start by marking your decrease points and work systematically for a smooth, symmetrical shape.
- Begin toe decreases about 2 inches before the desired length
- Use paired decreases on each side of the stocking
- Keep decreasing until a small opening is left
Your stocking is almost done! The foot and toe sections are key for a comfy, well-fitted garment that looks professional.
Adding Decorative Elements and Personalization
Once you’ve learned to knit a stocking, the fun really starts. You get to make it your own! Personal touches turn a simple stocking into a special holiday keepsake that shows off your style and creativity.
Color Work Patterns
Make your stocking pop with amazing color work designs. You can try:
- Simple stripes with different yarn colors
- Fair Isle patterns with shapes
- Intarsia for bold color blocks
Embellishment Options
Take your stocking to the next level with these embellishments:
| Embellishment Type | Difficulty Level | Visual Impact |
|---|---|---|
| Embroidered Snowflakes | Beginner | High |
| Sequin Accents | Easy | Sparkly |
| Fabric Appliqué | Intermediate | Textured |
Name Tags and Hanging Loops
Finish your stocking with special touches:
- Knit a custom name tag with duplicate stitch
- Make a strong hanging loop in matching or different yarn
- Add a decorative button or ribbon for extra flair
Remember, the key to a great stocking is your personal touch. Every stitch has a story. Your unique design will become a beloved holiday tradition.
Troubleshooting Common Stocking Knitting Issues
Knitting a christmas stocking pattern can sometimes feel like navigating a tricky craft maze. Don’t panic! Every knitter encounters challenges, and these roadblocks are opportunities to improve your skills.
When working on your christmas stocking knitting pattern, watch out for these common issues:
- Uneven Stitches: Practice consistent tension by holding your yarn and needles comfortably
- Unexpected Holes: Check your yarn overs and decrease techniques
- Sizing Discrepancies: Always measure your work and compare against the original pattern
Some specific troubleshooting tips for your christmas stocking knitting pattern include:
- Use stitch markers to track pattern repeats
- Count stitches frequently to catch mistakes early
- Keep tension consistent throughout your project
When you discover a mistake, don’t unravel everything. Learn to “tink” (knit backward) to fix small errors without destroying your entire work. Patience and practice transform challenges into triumphs in knitting.
Conclusion
Making your own holiday stockings is a fun journey of creativity and skill. Your first DIY stocking is a big achievement in knitting. Every stitch is not just a skill learned but also a personal touch to a special holiday tradition.
Knitting holiday stockings gets better with time. Don’t fret if your first one isn’t perfect. Every project teaches you something new. The charm of DIY stockings is their unique look and the love in every row. Your handmade stocking will be a family treasure, telling a story of patience and skill.
Keep practicing your knitting skills. Start simple, try different yarns, and then tackle harder patterns. Your holiday stocking project is just the start of a fun crafting journey. It will add warmth and a personal touch to your holiday decor.
Enjoy making something beautiful with your own hands. Each stocking you knit connects you to a long tradition of handmade holiday crafts. It celebrates your creativity and personal style. Happy knitting!