Crochet Christmas Stockings: A Step-by-Step Guide
Welcome to the ultimate guide on how to crochet Christmas stockings! This tutorial is perfect for both newbies and seasoned crocheters. You’ll learn to make beautiful holiday decorations that will be treasured for years.
Crocheting your own Christmas stocking is easier than you think. I’ll show you every step of the way. We’ll break down complex techniques into simple steps that anyone can follow.
Handmade stockings are more than just crafts. They’re about making memories. Each stitch tells a story. I’m excited to help you start your own tradition of making personalized holiday decorations.
In this guide, you’ll learn from selecting the perfect yarn to mastering essential crochet techniques. Don’t worry if you’ve never crocheted before. I’ll guide you with clear, encouraging instructions that make it fun and stress-free.
Get ready to turn simple yarn into magical Christmas stockings. These will become cherished family heirlooms. Let’s gather our supplies and start this creative journey together!
Essential Materials and Tools for Crocheting Christmas Stockings
Starting your beginner christmas stocking crochet pattern means getting the right stuff. You need the right tools and supplies for beautiful DIY holiday decor crochet. Let’s look at what you’ll need to make your festive stocking come to life!
Choosing the Right Yarn Types and Colors
Choosing the perfect yarn is key for your DIY holiday decor crochet project. I suggest using medium-weight yarns for warmth and texture. Here are some top yarn picks:
- Wool blend yarns for warmth and durability
- Acrylic yarns for easy care and vibrant colors
- Cotton blends for a softer feel
Choosing colors can make your beginner christmas stocking crochet pattern stand out. Traditional colors like red, green, and white are always a hit.
Required Crochet Hooks and Notions
| Tool | Purpose | Recommended Size |
|---|---|---|
| Crochet Hook | Primary crafting tool | G/4.0mm or H/5.0mm |
| Stitch Markers | Track pattern progress | Plastic or metal clips |
| Tapestry Needle | Weaving in ends | Blunt tip, medium size |
| Scissors | Cutting yarn | Sharp fabric scissors |
Optional Decorative Elements
Add fun to your DIY holiday decor crochet stocking with these embellishments:
- Metallic yarn for sparkly accents
- Buttons or small jingle bells
- Embroidery thread for personalized details
- Pom-poms or tassels for playful touches
Pro tip: Always get a little extra yarn. This way, you’ll have enough for practice and any mistakes in your beginner christmas stocking crochet pattern!
Understanding Basic Crochet Stitches for Stockings

Starting with festive crochet projects can seem scary. But, learning a few key stitches makes it easier. Knowing these stitches is key when following step-by-step stocking instructions.
Let’s look at the basic stitches you’ll need for your Christmas stocking:
- Chain Stitch (ch): This stitch is the base of most crochet projects, including your stocking.
- Single Crochet (sc): It’s a tight stitch that makes your stocking strong.
- Double Crochet (dc): This stitch is taller and works up fast, adding texture.
- Half Double Crochet (hdc): It’s a versatile stitch that’s between single and double crochet in height.
Beginners should practice these stitches on scrap yarn before starting their stocking. Each stitch has its own rhythm and technique. With practice, these become second nature.
Pro tip: Keep your tension even to make your stocking look neat and professional. Use a stitch marker to keep track of your progress and maintain an even edge.
Remember, every expert crocheter began where you are now. They learned the basics and built confidence with each stitch. Your first stocking might not be perfect, but it will be uniquely yours!
How to Crochet Christmas Stocking: Beginner’s Tutorial
Are you ready to make your own Christmas stocking? This easy guide will show you how to crochet a festive stocking. It’s a fun way to start a holiday tradition. Plus, making stockings is easier than you think!

Crocheting a Christmas stocking takes time and practice. It’s okay if it’s not perfect at first. Every stitch makes your stocking special.
Starting with the Toe Section
The toe section is the base of your stocking. Here’s how to start:
- Choose a soft, sturdy yarn in your favorite holiday color
- Use a magic ring technique to create a tight, seamless toe
- Start with single crochet stitches in a circular pattern
Creating the Foot Part
When moving to the foot, keep your stitches even. Pro tip: Count your stitches after each round to ensure even growth.
- Gradually increase stitches to form the foot shape
- Maintain a smooth, even texture
- Check the width periodically to match your desired stocking size
Forming the Heel
The heel can be tricky for beginners, but with practice, you’ll master this section. Work slowly and carefully, paying attention to your stitch count and shaping.
- Use short rows to create the heel’s curved shape
- Alternate between decreasing and increasing stitches
- Try different heel techniques to find your preferred method
Remember, each handmade Christmas stocking is unique. Small imperfections tell the story of your crafting journey!
Creating the Perfect Stocking Shape and Size
Making the perfect Christmas stocking needs focus on shape and size. When you learn to crochet Christmas stockings, knowing the right size is key. This ensures your DIY holiday decor looks great and can hold all the holiday gifts.

- Mastering increase and decrease stitches
- Understanding proportional sizing
- Creating a smooth, curved silhouette
Start with standard stocking sizes for your project. Here’s a sizing guide to help:
| Stocking Type | Length | Width at Top |
|---|---|---|
| Mini Stocking | 8-10 inches | 4-5 inches |
| Standard Stocking | 16-20 inches | 6-8 inches |
| Large Family Stocking | 22-24 inches | 9-10 inches |
Focus on the gradual shaping when crocheting. Begin with a narrower toe, then widen for the foot and heel. Finish by tapering back at the top. This creates a classic stocking look that’s both traditional and well-made.
Pro tip: Use stitch markers to mark increases and decreases. This keeps your project symmetrical and neat.
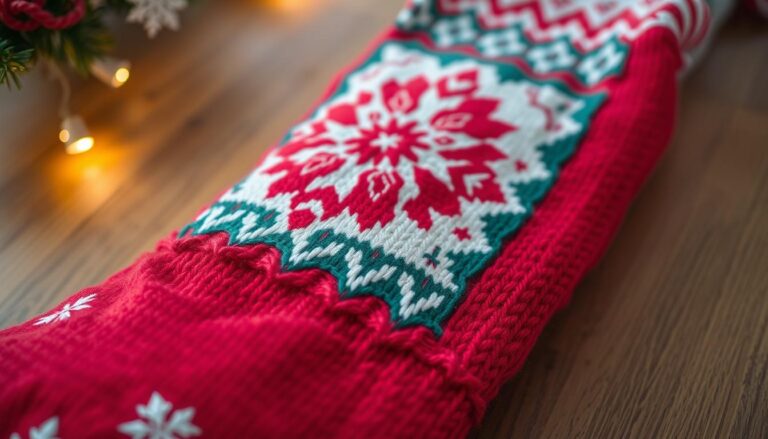
Festive Color Combinations and Pattern Ideas
Choosing colors and patterns is the most fun part of making handmade Christmas stockings. For beginners, picking the right colors can turn a simple stocking into a beautiful holiday decoration.

Color is key in festive crochet projects for beginners. It brings the holiday spirit to life. Let’s look at some color schemes that will make your Christmas stockings stand out!
Traditional Christmas Color Schemes
Classic holiday colors are always in style. Here are some timeless options:
- Red and white for a candy cane look
- Forest green and deep red for a traditional Christmas feel
- Gold and cream for an elegant design
Modern Design Inspiration
For those looking for modern handmade Christmas stocking ideas, try these colors:
- Soft mint green with silver accents
- Blush pink and metallic rose gold
- Arctic blue and white for a winter wonderland theme
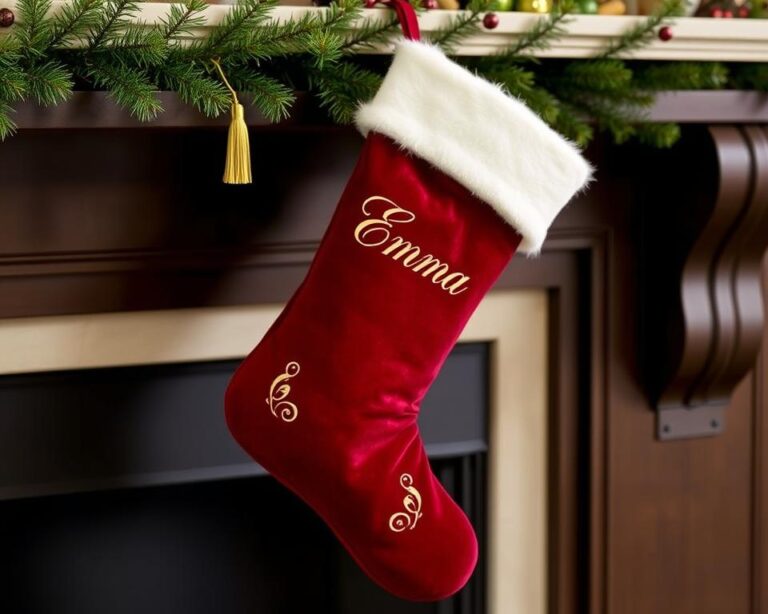
Personalization Options
Make your festive crochet projects unique with personal touches. Consider adding:
- Embroidered names or initials
- Custom color combinations that match your home decor
- Intricate border patterns that reflect family traditions
The beauty of crocheting your own Christmas stockings is the endless possibilities. Don’t be afraid to try new things and let your creativity shine!
Adding Decorative Elements and Embellishments
Make your DIY holiday decor crochet project stand out with creative embellishments. Easy crochet patterns for stocking making become special with the right touches. These make each piece uniquely yours.
Adding personality to your Christmas stocking is fun. Try these decoration techniques:
- Crocheted Snowflakes: Attach delicate white or metallic snowflake appliques
- Textured Yarn Accents: Use fuzzy or sparkly yarns for interesting borders
- Button Embellishments: Vintage or themed buttons create charming focal points
- Ribbon Details: Silk or velvet ribbons add elegant finishing touches
Color coordination is key in your DIY project. Pick embellishments that match your stocking’s color. They should also add visual interest.
| Embellishment Type | Difficulty Level | Impact on Design |
|---|---|---|
| Crocheted Snowflakes | Intermediate | High Festive Impact |
| Sequin Accents | Beginner | Subtle Sparkle |
| Pompom Trim | Easy | Playful Texture |
Pro tip for easy crochet patterns for stocking making: Start small with embellishments. A few well-placed decorative elements can make your stocking amazing.
Remember, the magic is in the details! Don’t be afraid to try new things. Let your creativity show in your holiday decorations.
Tips for Even Stitches and Professional Finishing
Making a perfect crochet Christmas stocking needs focus on the final touches. A detailed crochet stocking guide isn’t complete without learning professional finishing. Let’s dive into expert techniques to improve your crochet stocking tutorial.
Professional finishing turns a simple crochet project into a stunning piece. It focuses on three main areas:
- Consistent stitch tension
- Precise blocking methods
- Seamless edging techniques
Blocking Your Stocking: The Magic Touch
Blocking is a key step in your crochet stocking tutorial. This process makes your stitches even and gives your stocking a polished look. Here’s a quick guide to blocking:
- Wash your stocking gently in lukewarm water
- Squeeze out excess water without wringing
- Lay flat on a blocking mat
- Pin to desired shape and measurements
- Allow to dry completely
Seaming and Edging Techniques
Seamless connections are vital in crochet stocking guides. Here are some professional seaming methods:
| Technique | Best Used For | Difficulty Level |
|---|---|---|
| Mattress Stitch | Invisible vertical seams | Intermediate |
| Slip Stitch Join | Quick edge connections | Beginner |
| Whip Stitch | Securing loose edges | Beginner |
Pro tip: Practice these techniques on scrap yarn before your final stocking. Consistency is key for a professional-looking crochet Christmas stocking. It will become a treasured holiday tradition.
Common Mistakes to Avoid When Crocheting Stockings
Crocheting Christmas stockings can be tricky for beginners. Many crafters face similar challenges when learning how to crochet Christmas stocking patterns. These challenges can make their project look less than perfect.
Let’s explore some common mistakes in beginner Christmas stocking crochet patterns that you’ll want to watch out for:
- Inconsistent Tension: Maintaining even tension is key. Uneven stitches can make your stocking look lumpy or misshapen
- Incorrect Stitch Counting: Losing track of your stitches can throw off the entire stocking shape
- Overlooking Gauge: Not checking your gauge can result in a stocking that’s too small or too large
- Skipping Stitch Markers: These helpful tools prevent mistakes in complex patterns
When working on your beginner Christmas stocking crochet pattern, pay close attention to these common mistakes. Practice makes perfect, and each attempt will improve your skills.
Pro tip for those learning how to crochet Christmas stocking designs: Always work in good lighting and take breaks to prevent eye strain and maintain consistent stitches. If you make a mistake, don’t get discouraged – unraveling and re-crocheting is part of the learning process!
- Take your time
- Use stitch markers
- Check your work frequently
- Practice on scrap yarn first
Remember, every experienced crocheter started exactly where you are now. Your first stocking might not be perfect, but it will be uniquely yours – and that’s what makes handmade crafts special!
Storage and Care Instructions for Crochet Stockings
Keeping your handmade Christmas stockings safe is key. They are special treasures that need care to stay beautiful and meaningful.
When it comes to cleaning, be gentle. Spot cleaning is good for small stains. For bigger stains, hand washing is best. Use mild detergent and cool water to avoid damage.
- Avoid machine washing or drying crocheted stockings
- Use lukewarm water for spot cleaning
- Lay flat to dry on a clean towel
- Keep away from direct sunlight
Storage is important when you’re not using them. Protect your DIY holiday decor crochet creations with these steps:
- Clean thoroughly before storing
- Wrap in acid-free tissue paper
- Store in breathable cotton bags
- Keep in cool, dry locations
- Avoid plastic containers that trap moisture
By following these tips, your stockings will stay in great shape. They’ll be ready to bring joy for years to come. Taking good care of them makes them family treasures to pass down.
Conclusion
Starting festive crochet projects for beginners might seem tough, but you’ve just finished a great Christmas stocking tutorial. This shows that creativity has no limits. Your handmade stocking is more than holiday decor; it’s a personal expression of your skill and passion.
In this crochet Christmas stocking tutorial, you’ve picked up techniques that turn simple yarn into cherished memories. Each stitch adds your unique touch, making your creation special. Whether you’re new or improving, remember that practice boosts confidence and creativity.
The beauty of handmade crafts is in their imperfections and personal charm. Your stocking will become a treasured family heirloom, telling a story of patience, creativity, and holiday spirit. Enjoy the learning, celebrate your successes, and keep exploring the world of crochet.
Keep trying new patterns, experimenting with colors, and sharing your crafting journey. Your handmade stockings will not just decorate your home but will create lasting memories for years to come.