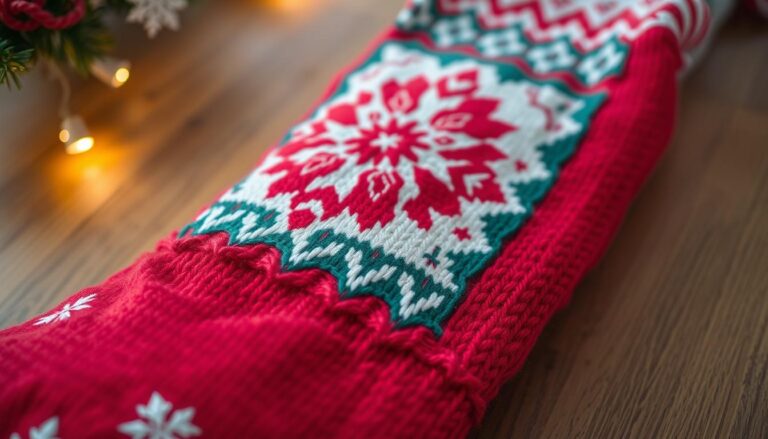
How to Make a Christmas Stocking: Easy DIY Guide
Are you ready to make a Christmas stocking that shines with your own special touch? DIY Christmas stockings are a great way to add warmth to your holiday decor. I’ll show you how to make a stocking that will be a cherished family heirloom.
Making your own stocking is more than just a hobby. It’s a chance to create something truly unique. This guide is for everyone, whether you’re experienced or new to crafting. You’ll learn how to pick the right fabrics and add your own special touches.
In this detailed guide, I’ll share all the essential information. We’ll talk about materials, techniques, and tips to make your crafting experience fun. Get ready to let your creativity shine and make a stocking that will bring happiness for years!
Essential Materials and Tools for DIY Christmas Stockings
Making a homemade Christmas stocking is a fun craft project. It needs the right materials and tools. Your guide to making a stocking starts with picking the best supplies.
Before you start, let’s look at what you need for a beautiful stocking. It will become a special holiday tradition.
Fabric Types and Requirements
Choosing the right fabric is key for your stocking. Here are some great options:
- Cotton: Soft, versatile, and easy to work with
- Felt: Thick and festive, perfect for traditional designs
- Velvet: Luxurious and elegant holiday material
- Flannel: Warm and cozy for winter-themed stockings
Required Tools and Notions
Your guide suggests these tools for making stockings:
- Sharp fabric scissors
- Sewing machine (or needle for hand sewing)
- Measuring tape
- Pins and needles
- Fabric chalk or marker
| Material | Recommended Quantity | Estimated Cost |
|---|---|---|
| Cotton Fabric | 1/2 yard | $5-$10 |
| Interfacing | 1/4 yard | $3-$5 |
| Thread | 1 spool | $2-$4 |
Optional Decorative Elements
Add a personal touch to your stocking with these embellishments:
- Sequins and beads
- Embroidery thread
- Ribbon trims
- Fabric paint
- Decorative buttons
With these materials and tools, you’re set to begin your stocking-making journey. Be creative and make your stocking truly unique!
Choosing the Perfect Fabric for Your Christmas Stocking
Starting to sew Christmas stockings means picking the right fabric is key. The right material can turn a simple stocking into a treasured holiday gift.
Here are some great fabric choices to make your stocking special:
- Cotton: Versatile and easy to work with, perfect for beginners
- Felt: Provides a classic, sturdy texture ideal for traditional designs
- Velvet: Adds luxurious softness and elegant sheen
- Flannel: Warm and cozy, great for winter-themed stockings
When picking fabric for your stocking, think about these important points:
- Durability: Choose materials that can withstand holiday wear and tear
- Comfort: Pick soft fabrics that feel pleasant to touch
- Aesthetic: Select colors and patterns that match your holiday decor
Pro tip for sewing Christmas stocking crafts: Mix and match textures to create unique, eye-catching designs. A velvet main body with a cotton cuff can produce stunning visual contrast!
Remember, your fabric choice sets the tone for the entire stocking. Take your time, have fun, and let your creativity shine!
How Do You Make a Christmas Stocking: Step-by-Step Guide
Making your own Christmas stocking is a fun craft project. It adds a personal touch to holiday decor. Whether you’re new to crafting or have experience, making a Christmas stocking is rewarding. I’ll guide you through making an easy stocking that will become a family tradition.
Start by gathering your materials and setting up a workspace. The secret to a great DIY stocking is being prepared and patient.
Creating Your Pattern
Designing your stocking pattern is the first step. You have a few options:
- Create a custom pattern using paper or cardboard
- Use a pre-existing template from craft stores
- Download printable patterns online
Cutting and Preparing Materials
When cutting fabric, precision is key. Here’s how to make an easy stocking:
- Trace your pattern onto folded fabric
- Leave extra seam allowance (about 1/2 inch)
- Cut carefully using sharp fabric scissors
Basic Assembly Instructions
Assembling your stocking needs careful sewing. Pro tip: Pin your fabric pieces together before sewing. Start by sewing the main body, then add the cuff and hanging loop.
Don’t worry if your first stocking isn’t perfect. Each try will get better and create a special, handmade gift.
Personalization Ideas for Custom Christmas Stockings

Making a personalized Christmas stocking turns a simple decoration into a family treasure. It shows off your creativity and love, making it special for everyone. It can reflect your family’s unique style and traditions.
Here are some fun ways to make your Christmas stocking special:
- Embroidery with Names and Special Dates
- Appliqué Holiday Designs
- Custom Photo Transfer Techniques
- Fabric Paint Decorations
- Vintage Button and Patch Embellishments
If you want a personalized Christmas stocking that shows off your style, try these ideas:
- Monogram the stocking with elegant script lettering
- Add meaningful family symbols or hobby-related icons
- Create themed stockings matching personal interests
There are options for all skill levels. Beginners can use fabric markers or iron-on transfers. These are great for starting out with festive stocking crafts.
| Personalization Method | Difficulty Level | Time Required |
|---|---|---|
| Fabric Paint Decoration | Beginner | 30-60 minutes |
| Machine Embroidery | Intermediate | 1-2 hours |
| Detailed Appliqué Design | Advanced | 2-3 hours |
The key to a great personalized Christmas stocking is the love and effort you put into it. Your unique design will be a treasured holiday memory for years.
Adding a Decorative Cuff and Hanging Loop
Turning your homemade Christmas stocking into a showstopper is easy with two key steps: the decorative cuff and hanging loop. These add both style and function to your DIY project.
Crafting the Perfect Decorative Cuff
When making a cuff for your stocking, think about a few design ideas:
- Fold-over fabric cuff with contrasting patterns
- Quilted cuff for extra texture
- Embroidered edge detailing
- Fur-trimmed luxury style
Securing Your Hanging Loop
The hanging loop is not just useful; it’s also a chance to add to your stocking’s design. Here are some ways to attach it:
- Reinforce the loop with sturdy interfacing
- Select a complementary fabric color
- Ensure the loop is securely stitched at multiple points
- Position the loop for balanced hanging
Pro tip: Pick materials for your cuff and loop that match your stocking but stand out. Texture can make a huge difference in the overall aesthetic!
Embellishment Techniques for Festive Stockings

Making a special christmas stocking is all about turning a simple piece of fabric into a holiday treasure. Decorating your stocking lets you show off your unique style and creativity during the holidays.
Exploring festive stocking craft, you’ll find many exciting ways to decorate:
- Ribbon Trims: Add elegant or playful ribbons along stocking edges
- Sequin Decorations: Create sparkling patterns or designs
- Embroidery: Personalize with names or holiday motifs
- Button Accents: Attach vintage or themed buttons
- Fabric Appliqués: Attach decorative fabric shapes
To achieve a professional look, it’s key to balance your decorations. Less can often be more in creating a beautiful stocking design.
| Embellishment Type | Difficulty Level | Visual Impact |
|---|---|---|
| Ribbon Trim | Easy | Moderate |
| Sequin Work | Intermediate | High |
| Embroidery | Advanced | Very High |
Remember, the joy of festive stocking craft is in the journey. Feel free to try out new techniques and materials. This way, you can make a stocking that truly captures your holiday spirit!
Tips for Lining Your Christmas Stocking
Lining your Christmas stocking can make it look professional. It adds durability and a nice finish. It’s worth the extra effort.
Choosing the right material for the lining is key. It should be soft, smooth, and not snag small gifts.
Selecting the Perfect Lining Materials
What you choose for the lining matters a lot. Here are some great options:
- Cotton quilting fabric for breathability
- Soft flannel for extra warmth
- Lightweight silk for a luxurious touch
- Lightweight polyester for durability
Stocking Lining Installation Process
Here’s how to line your stocking smoothly:
- Cut lining fabric slightly smaller than outer stocking fabric
- Pin lining carefully to avoid shifting
- Sew with a straight stitch around the edges
- Trim excess fabric for a clean finish
Pro tip: Always press your lining fabric before cutting to prevent uneven edges. This small step can dramatically improve your stocking’s overall appearance.
No-Sew Christmas Stocking Alternatives

Not everyone likes sewing, but you can make beautiful Christmas stockings without it. These DIY alternatives let you create stunning holiday decorations without sewing.
Making an easy Christmas stocking is surprisingly simple with no-sew methods. I’ll show you creative ways to make stockings that anyone can do, no matter their sewing skills.
No-Sew Stocking Methods
- Fabric Glue Technique
- Iron-On Adhesive Method
- Felt Folding Approach
- Fabric Tape Construction
Materials You’ll Need
| Material | Purpose | Cost |
|---|---|---|
| Fabric Glue | Bonding Fabric Edges | $3-$5 |
| Iron-On Adhesive | Securing Seams | $4-$7 |
| Fabric Scissors | Cutting Fabric | $10-$15 |
The fabric glue method is great for beginners. Just apply glue along the edges, press, and let it dry. Pro tip: Use clothespins to hold edges together while drying!
If you prefer using heat, iron-on adhesive strips are perfect. Cut your fabric, align the edges, place the adhesive, and iron it. In minutes, you’ll have a stocking that looks like it was professionally made.
Remember, creativity has no limits. These no-sew stocking DIY methods show that anyone can make festive decorations with little crafting experience.
Troubleshooting Common Stocking Making Problems
Learning to make a Christmas stocking can be tricky. But don’t worry! Every DIY project has its own set of challenges. With the right guide, you can solve most of them.
Making the perfect stocking takes patience and problem-solving skills. Let’s look at some common issues you might face.
Solving Fabric Alignment Challenges
Alignment problems can ruin your stocking’s look. Here are some quick fixes:
- Use fabric pins to hold pieces in place before sewing
- Check pattern alignment multiple times before cutting
- Work on a flat, well-lit surface to ensure precision
Navigating Thick Fabric Difficulties
Thick fabrics can be hard to work with. Here’s a helpful approach:
| Fabric Type | Recommended Technique |
|---|---|
| Wool | Use a heavy-duty needle and longer stitch length |
| Velvet | Use tissue paper underneath to prevent slipping |
| Fleece | Reduce presser foot pressure |
Remember, practice makes perfect. Each challenge is a chance to get better at crafting!
Care and Storage Guidelines for Handmade Stockings

Making a homemade Christmas stocking is a special task. To keep it looking great for years, it’s important to care for and store it properly.
Cleaning your handmade stocking needs gentle care. Different materials need different cleaning methods:
- Cotton stockings: Machine wash on gentle cycle with cold water
- Wool stockings: Hand wash with mild detergent
- Delicate embellished stockings: Spot clean only
When storing your handmade Christmas stocking, follow these tips:
- Clean it well before storing
- Wrap it in acid-free tissue paper
- Keep it in a cool, dry place away from sunlight
- Don’t use plastic bags that can hold moisture
Pro tip: Use a fabric garment bag or an archival storage box. This will protect your stocking from dust and damage.
By taking care of your handcrafted stocking, it will be a beloved holiday decoration for years.
Creative Design Variations for Modern Christmas Stockings
Make your christmas stocking DIY project stand out with new designs. Modern festive stocking craft is all about showing off your style and creativity. It’s not just about red and green anymore.
Check out these fresh ways to make your holiday stockings pop:
- Minimalist Chic: Choose solid colors like white, gray, or soft pastels. Add clean geometric patterns.
- Industrial Glam: Go for metallic fabrics, leather, or even canvas.
- Boho Inspired: Add macramé, embroidery, or textured fabrics.
Color is key in modern christmas stocking DIY designs. Try these bold palettes:
- Deep jewel tones (emerald, sapphire, burgundy)
- Monochromatic schemes
- Ombré color gradients
Don’t stick to traditional shapes. Try asymmetrical designs, angular cuts, or unique shapes. This will make your stockings stand out.
The aim is to make a stocking that shows off your style. But keep the holiday spirit and joy alive.
Conclusion
Learning to make a Christmas stocking is more than a craft. It’s about making memories and starting traditions. We’ve covered everything from picking fabrics to adding special touches that make each stocking unique.
I’ve shown you how to turn simple items into holiday treasures. Whether you’re new to crafting or have experience, making your own stocking is fun and rewarding. You’ll learn to create decorations that show off your style and family traditions.
Your handmade Christmas stocking is more than a decoration. It’s a canvas for your creativity, a symbol of love, and a keepsake for generations. Every stitch and design tells your story.
When you start making your stocking, don’t worry about making it perfect. Love the imperfections, enjoy the process, and have fun making it your own. Your handcrafted stocking will show off your creativity and holiday spirit.